|
VideoRay Cockpit Software UpdatesSoftware updates provide new features and capabilities. Updates are available using the Downloads link at the top of any page of this documentation. The VideoRay Cockpit software consists of two parts, a topside control program that includes the user interface, and ROV firmware that communicates with the topside and manages the ROV systems and sensors. The topside software update process is similar to most other conventional software applications. There are special procedures to update the ROV firmware. The ROV firmware update process is described below. In addition, systems tuning parameters are stored on the ROV. When updating VideoRay Cockpit, the ROV should be updated with any new default systems tuning parameters that might be included with the update. If there are new systems tuning parameters included with the update, and you do not store these on the ROV, then ROV will continue to use the old settings and its performance may not be optimal. The systems tuning parameters are different from the firmware and the procedures to store them on the ROV are also describe below. Software Update ProcessThe basic steps for the update process are as follows:
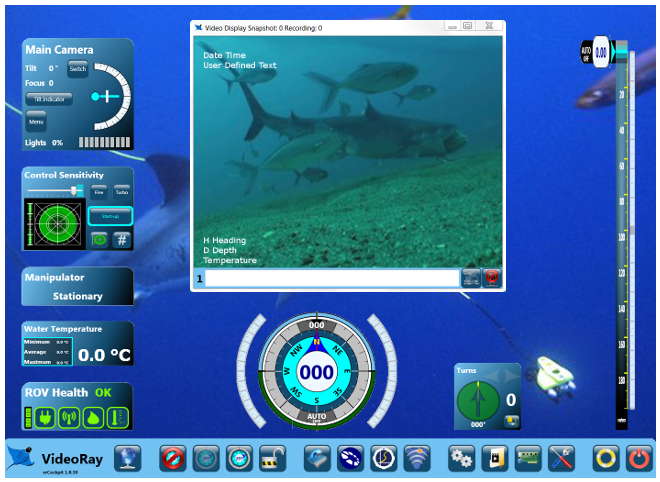
1. Check for UpdatesTo check for updates, verify the current version number. The version number can be found in the left hand corner of the VideoRay Cockpit Control Bar below the VideoRay logo. Use the Download link at the top of the page to access VideoRay's download center and ascertain if newer software is available. Update packages will be named Setup_vrCockpit_ryyyymmdd.zip or FULL_Setup_vrCockpit_ryyyymmdd.zip (if prerequisites are required), where the yyyymmdd is the release date. 2. Download the UpdateIf newer software is available, download the update package and save it in C:\VideoRay\Installs\videoray\. C:\VideoRay\Installs\ has been set up to store all installation packages on the local machine in case a product needs to be reinstalled. 3. Unzip the UpdateUnzip the update package. Windows includes an unzip facility, or you can use one of the many zip/unzip utilities available. 4. Install the Topside SoftwareThe installation program will be named setup.exe. Run the installation program. This will update the software on the topside computer. Follow the steps below to update the ROV firmware and systems tuning parameters. 5. Update the FirmwareTo update the firmware, connect the ROV directly to the control panel, and make sure that no accessories are connected to the ROV's accessory port. Turn on the power and run VideoRay Cockpit. When VideoRay Cockpit is running and connected to the ROV, click on the Engine Room button on the Control Bar to open the Engine Room. From within the Engine Room, click on the VideoRay Update button.
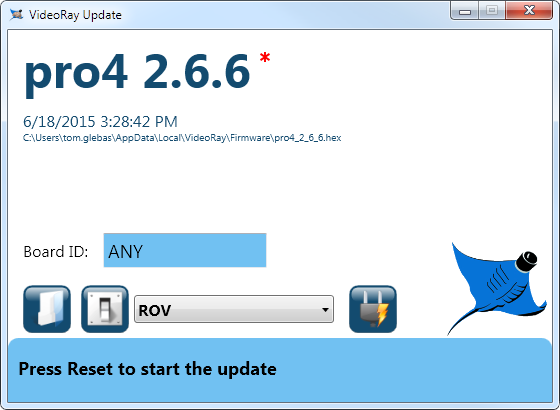
This will start the VideoRay Update software. The software should automatically locate the most up-to-date version of the firmware, and its version number will be displayed in the VideoRay Update Window.
Click on the Reset button to install the firmware, or if you wish to install another version of the firmware, click on the Open button and navigate to find the desired version. Once the desired version is selected, click on the Reset button to install the firmware.
6. Load the Factory Default Systems Tuning ParametersWith VideoRay Cockpit running, click on the Engine Room button. Unlock the systems tuning parameters by clicking on the lock toggle. Click on the Restore Factory Defaults button.
7. Store the Systems Tuning Parameters on the ROVClick on the Store Settings on the ROV button. See the Systems Tuning section of the Engine Room for more information about systems tuning parameters.
|
||||||||||||
Alternate MethodUpdating the firmware can also be accomplished by running VideoRay Update as a stand-alone program using the Start->All Programs->Videoray->VideoRay Update program icon or desktop icon. |